Instruction: Host Tap Assignment
Mission 7 (5 pts). What host IP/MAC address performed the attack?
Mission 8 (5 pts). What industrial protocol register was attacked?
- At this point, we should have the VirtuaPlant operational, WireShark up and running in the background with an attack running against the VirtuaPlant. Mission 7 asks us to identify what host IP and MAC address performed the attack. In controlled environments such as this, we could spend the time trying to sift through all of the captured network packets and determine who did the attack. However, it would be easier and beneficial if we know what a good environment and expected network activity looks like. In a real environment, analysts should also know what a good environment and expected network activity looks like. With that, let’s first determine what normal looks like, perform the attack and then try to find who performed the attack.
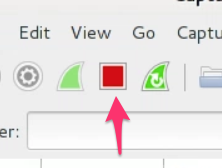
- Go to WireShark and click on the red “Stop” button if WireShark is running
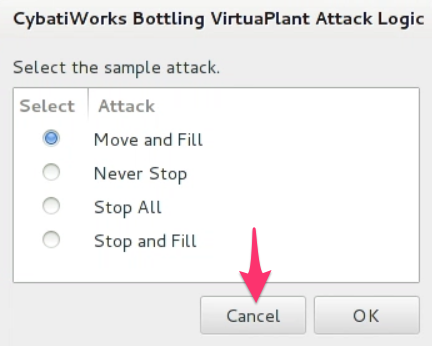
- Double click on “7. Execute Logic Attacks (WIZARD)”
- Make sure “Move and Fill” is selected and click “Cancel”. This will stop the attack against the simulated bottling process in VirtuaPlant.
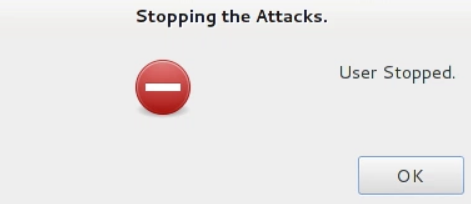
- An alert popup box will appear to let us know that the attack has been stopped. Click “Ok”.
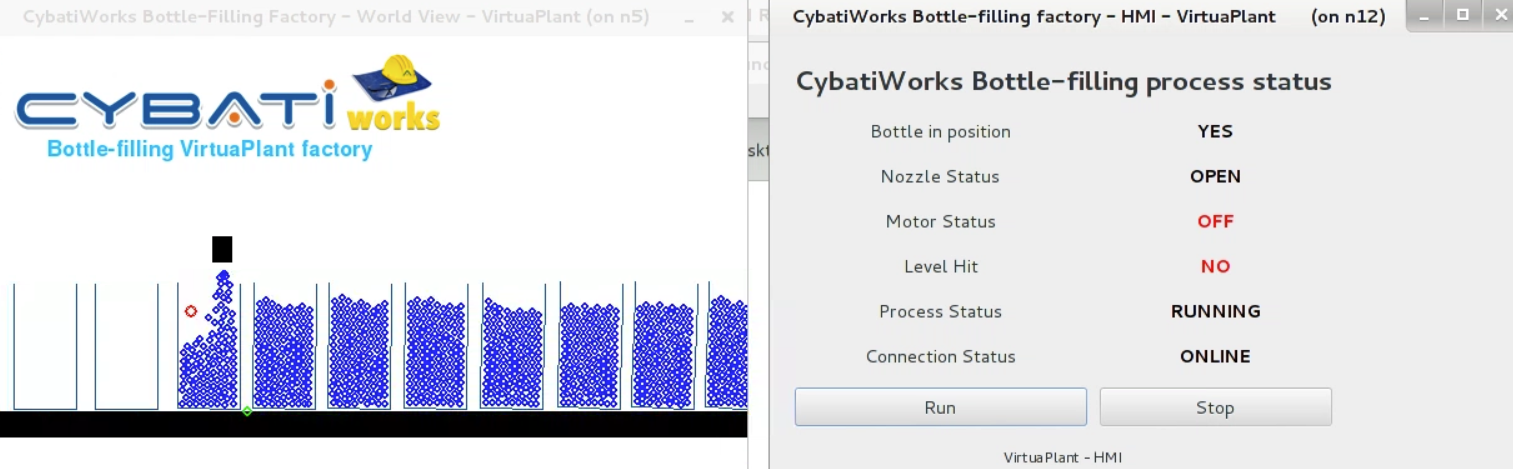
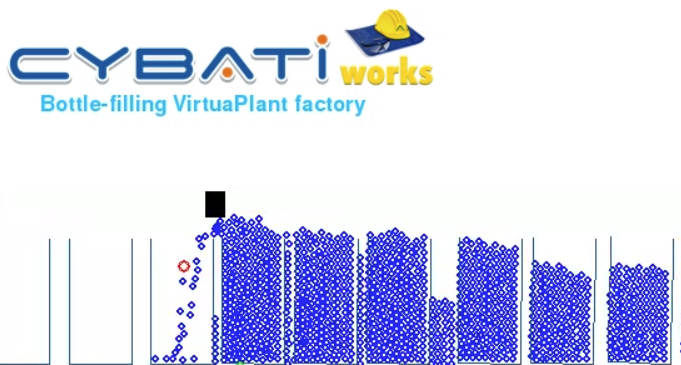
- Back in the Cybati Bottle-filling VirtuaPlant factory, we can see that the process is running as expected
- Now we can go to WireShark, capture network traffic and analyze the results
- Go into WireShark and click the green “shark fin” button to collect network traffic
- Click “Continue without Saving” to the popup box
- Now we should see network traffic and we can monitor traffic to the Cybati Bottle-filling VirtuaPlant factory to determine appropriate network traffic. After a few minutes of network activity, click on the red “Stop” button.
- In Wireshark, left click on “Statistics” at the top, but hold down the left click button. You will need to hold down the button and hover over “Conversations” in the list. Once your mouse cursor is over “Conversations”, let go of the left mouse button to open up the “Conversations” window.
- Click on the “IPv4” tab
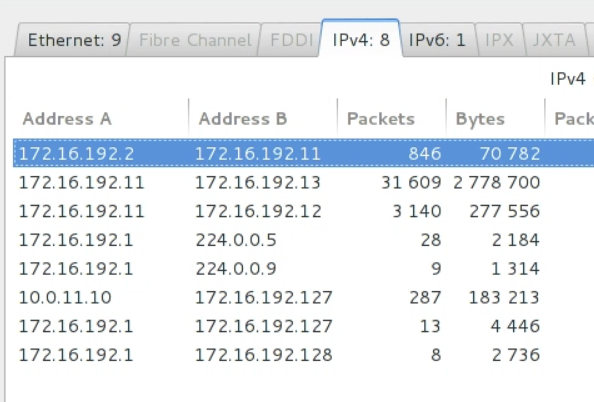
- Here we can see expected network activity
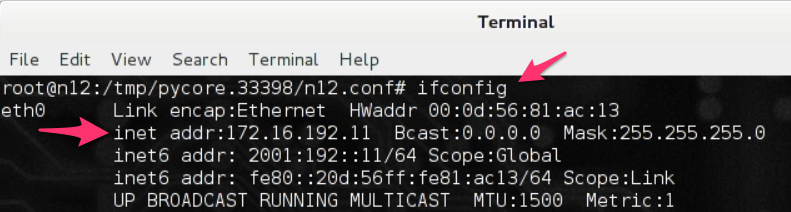
- In the above screenshot, we can see that 172.16.192.2 (the system n5) just talks to 172.16.192.11 (the system n12). The “n5” system is the one with the “World View” of the Cybati Bottle-filling VirtuaPlant factory. We can see the HMI on “n12” has more network connections to other hosts.
- Click “Close” on the Conversations window and return to WireShark
- Click the green “shark fin” button to collect network traffic
- Click “Continue without Saving” in the popup box
- Double click on “7. Execute Logic Attacks (WIZARD)”
- Make sure “Move and Fill” is selected and click “Ok”. This will start the attack against the Cybati Bottle-filling VirtuaPlant factory.
- Open the “World View” to and we can see that the attack is working as intended. The bottling process is not stopping at the appropriate level or the specified amount of time.
- WireShark should be capturing the network traffic from the attacker against our systems. Let’s ensure that we get enough network traffic and let this process occur for a few minutes.
- In WireShark, click on the red “Stop” button.
- In Wireshark, left click on “Statistics” at the top, but hold down the left click button. You will need to hold down the button and hover over “Conversations” in the list. Once your mouse cursor is over “Conversations”, let go of the left mouse button to open up the “Conversations” window.
- Click on the “IPv4” tab
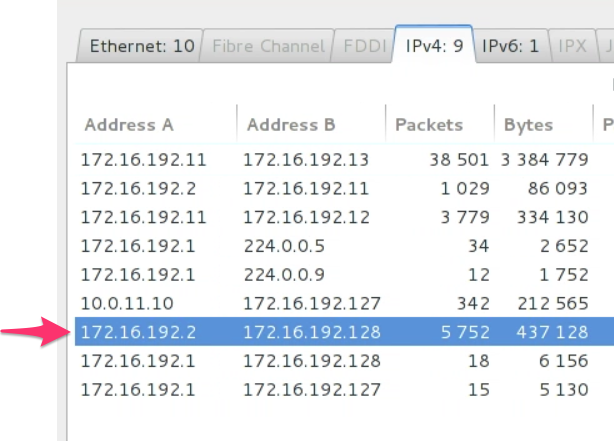
- Now we see a new IP address of 172.16.192.128 has communicated with the n5 system
- Right click on the line above (your results for Address A and B should be the same) and click on “Apply as Filter”, then “Selected” and then “A <- B”
- WireShark will process the filter in the background and you will still be in the Conversations window. Click “Close”.
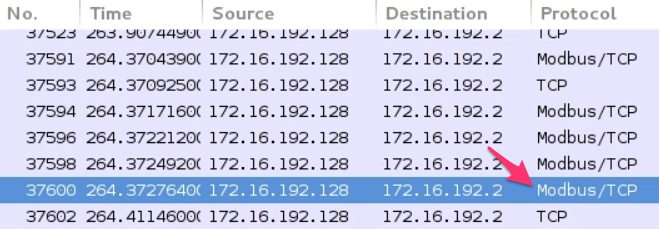
- In WireShark, we will see network traffic where the IP address of 172.16.192.128 is talking to n5 (172.16.192.2) which hosts the “World View”
- If we scroll through all of the results, we see a repeating pattern of the protocols used of “TCP” and “Modbus/TCP”
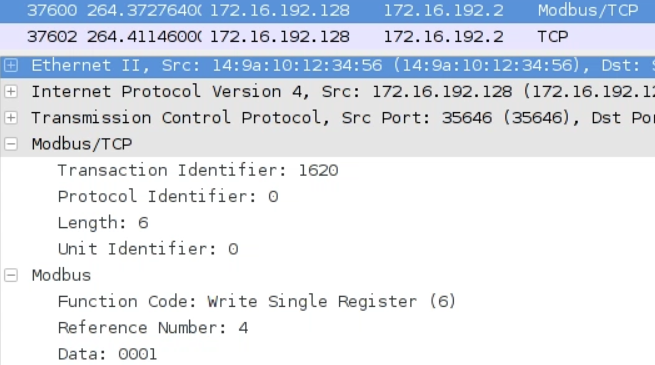
- If we examine the network packet in the window below, we can see more information about the network conversation. If you left click on a similar packet as the screenshot below, you can see information in the lower pane (e.g. where “Ethernet” is highlighted).
- In the above screenshot, we can answer the question to Mission 7. The mission asks for the IP address and MAC address of the attacker. Here, we can see the attacker has an IP address of 172.16.192.128 along with a MAC address of 14:9a:10:12:34:56. We can verify this by clicking on the “+” symbol next to “Ethernet” as seen below and clicking on the “+” symbol next to “Source:”
- Ensure in the network packet window that you are on a packet with a “Modbus/TCP” protocol
- In the lower pane, make sure that “Modbus/TCP” and “Modbus” are the only ones with the “-” symbol as below
- From the above screenshots, we can see that the attacker IP address is performing a write action (6) (reference: http://www.simplymodbus.ca/FC06.htm). But, it is difficult to determine what is being set. Even if we were to see traffic to and from the attacker to n5, it is not really apparent what is happening. We can see that registers are being set, but it’s not too clear which or why this matters. The traffic between these two systems is a query (such as writing to a register) and a response of the command that was sent. If we were to remove filters completely, we would see that the HMI queries n5 (World View) to see what the values are in the ModBus registers. However, these requests can go by pretty fast unless we stop the network capture and investigate the network traffic.
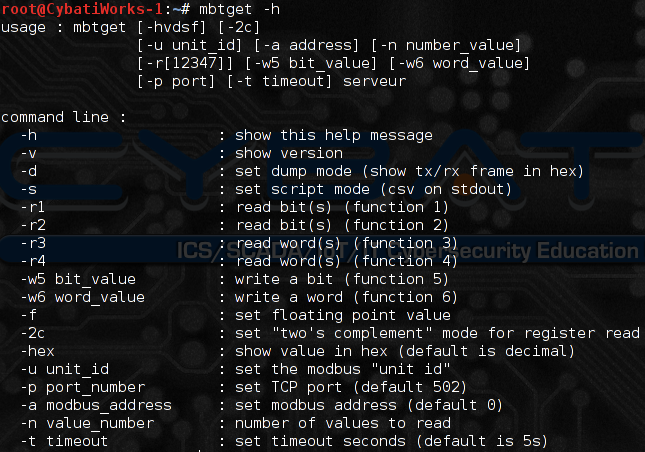
- There are multiple ways to determine values in Modbus registers. One common way is with the “mbtget” tool. This tool allows the user to read or write to a register on a ModBus server.
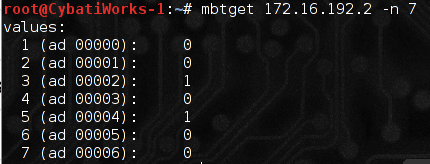
- We can target n5 by IP address to retrieve Modbus register values. In the example below, we are reading the first 7 values from the Modbus server. When the bottles are not being filled, we see the ModBus register values as below:
- When the bottles are being filled, we see the Modbus register values below:
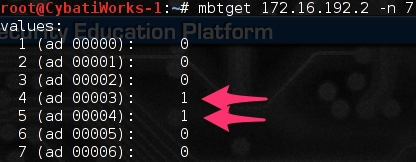
- Once the attack of “Move and Fill” is initiated, the bottles are supposed to not be filled, but the nozzle continues to run regardless of registers 1 and 3 being set to “1”.
- The timing appears to be changed as well and the attack alters registers 3 and 4 to “1” when the bottles are supposed to be filled:
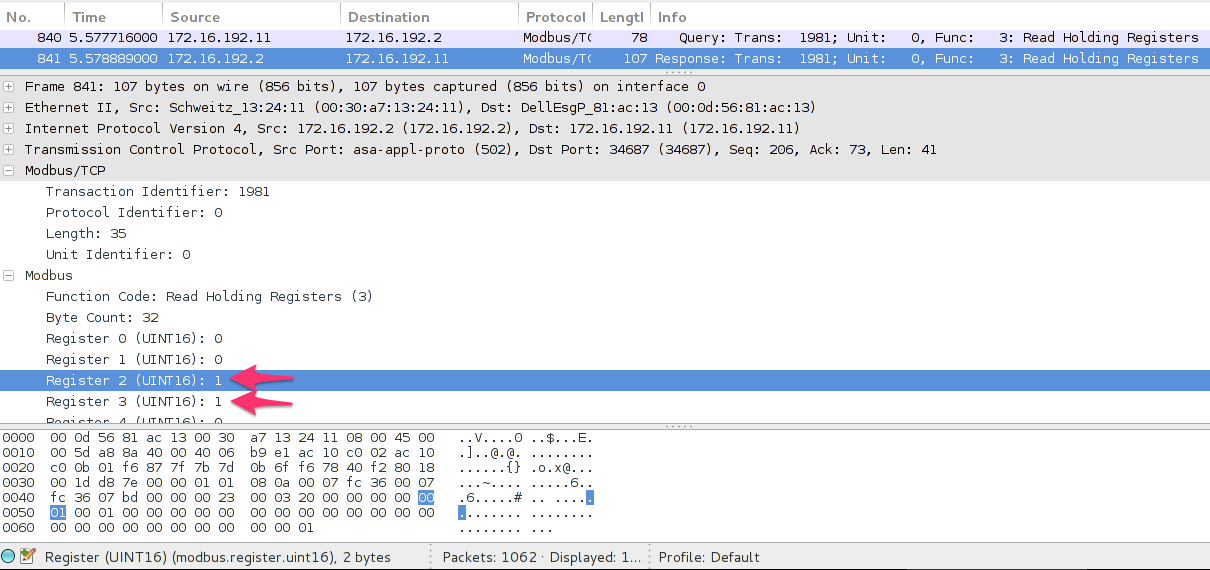
- If we look at WireShark at the same time as the attack above, we can see the HMI reading the same values from the n5/World View server. This particular network session is the n12/HMI server receiving a response from n5 and it’s Modbus registers. The n12/HMI server had issued a query to n5 to retrieve the Modbus register values.
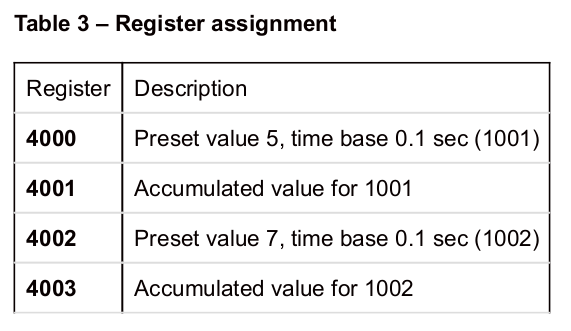
- Based on the above screenshot, it appears in the above screenshot that Register 2 is the register being attacked to answer Mission 8. From the “Bottle Filling Engineering” document, this would appear to translate to register 4002 listed on page 3.