Step 11 - “Hello” GDB demonstrated in 5 parts
In the previous post, we were able to get the appropriate “pre-checks” done for GDB/pwndbg. We trudged through the steps necessary to get GDB/pwndbg correctly aligned with steps to get a better debugging experience. This post will briefly examine the “hello” binary in GDB/pwndbg and then go through each line step-by-step in GDB/pwndbg. This is blog post 11, part 5 of 5, of post x in the learning with DVRF project series.
Part 5: Now for the grand finale!
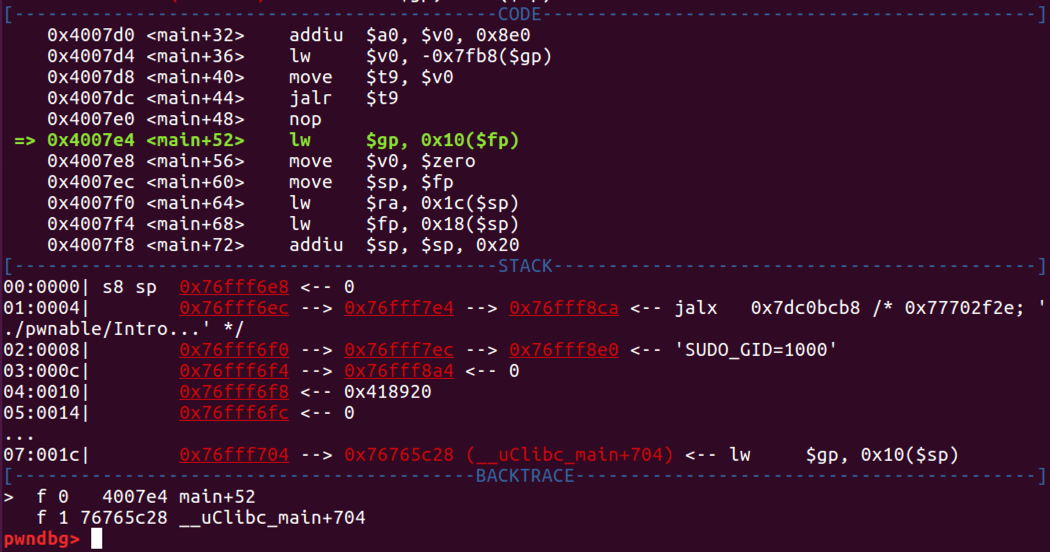
- Let’s recap where we’re at in our disassembled output. In pwndbg, type in:
context - Based on prior articles, we see that we have accomplished the meat of the program and will perform cleanup. The program will continue with loading the value that is at an offset of 0x10 from the frame pointer ($s8 register, but referenced as $fp in the screenshot above). From the stack section, the value of 0x418920 will be loaded into the $gp (global pointer) register.
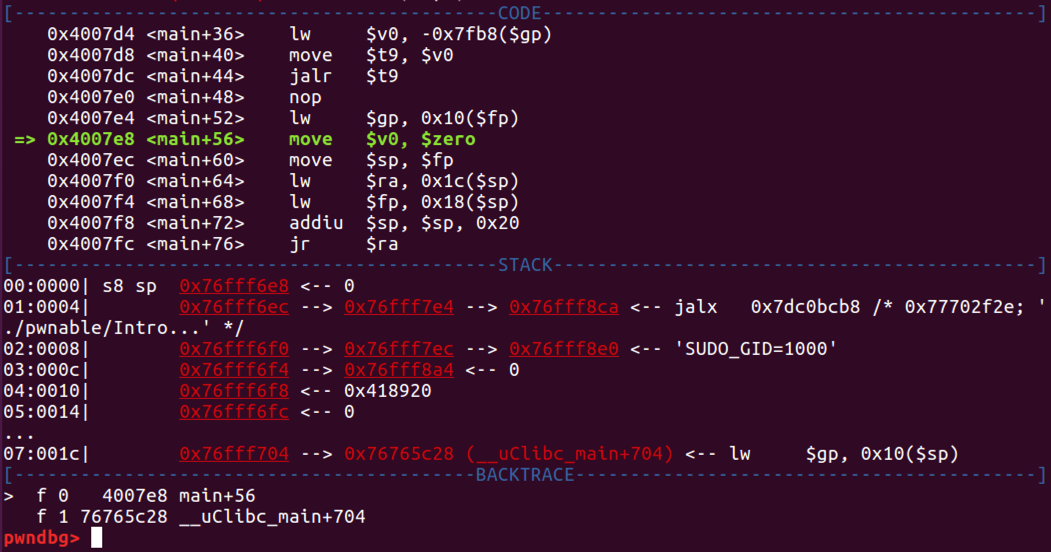
- Let’s step through the next instruction. In pwndbg, type in:
n - The register section above does not include the global pointer ($gp) register. Let’s check it out. In pwndbg, type in:
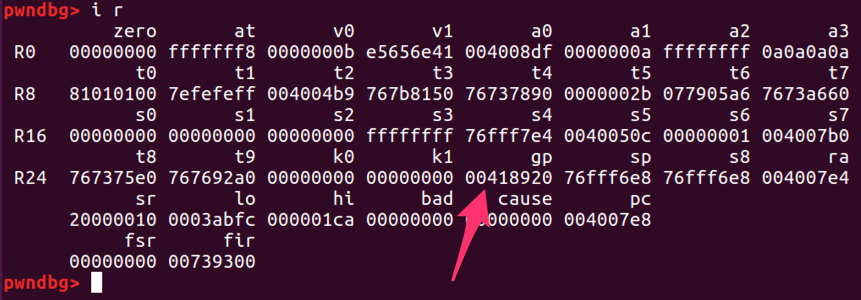
i r - We can see the program restored the $gp register back to the original value that was saved on the stack. The next instruction will move 0 into the $v0 register. Currently, the $v0 register has the value of “0xb”. Let’s step through the next instruction. In pwndbg, type in:
n - If we look at the $v0 register, we notice there is a “*” by it and the register holds the value of 0
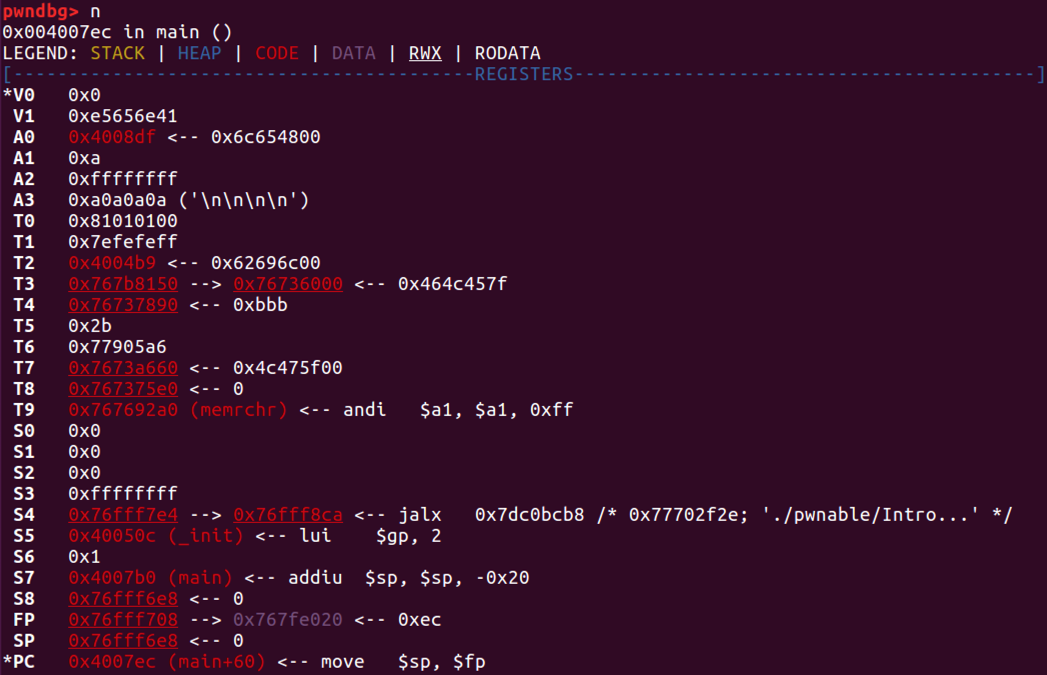
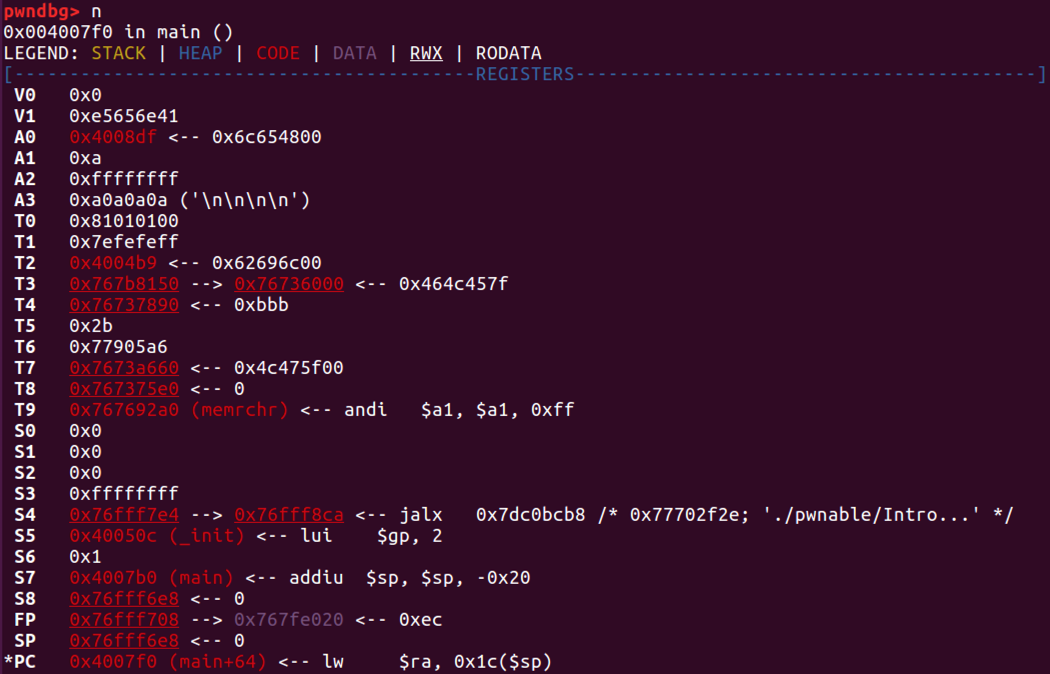
- The next instruction moves the $fp register value to the $sp register value to restore the original stack pointer location. We observe that both $s8 and $sp have the same memory location and value.
- It would appear that this next instruction won’t do much from what we can see. In pwndbg, type in:
n - The next instruction will move the value at an offset of 0x1c from the $sp register into the $ra register. Looking at the screenshot above, it looks like 0x76765c28 will move into the $ra register. Lucky for us, we can see that it looks like this address points to the address space within uClibc’s main function which would appear to also start the cleanup for that function once program control returns to that space. That’s kinda neat. Let’s look at the current value in $ra. In pwndbg type in:
i r - The $ra register will be overwritten with 0x76765c28. The current value in $ra is the location of "lw" after the jump to printf.
- In pwndbg, type in:
n - Let’s take a look at the $ra register. In pwndbg, type in:
i r - The next instruction will move 0x18 from the $sp register into the $fp register (which will affect the $s8 register). The 0x18 line in the stack section has three dots which would be between 14 and 1c. This probably just means that the $s8 register will remain at 0.
- In pwndbg, type in:
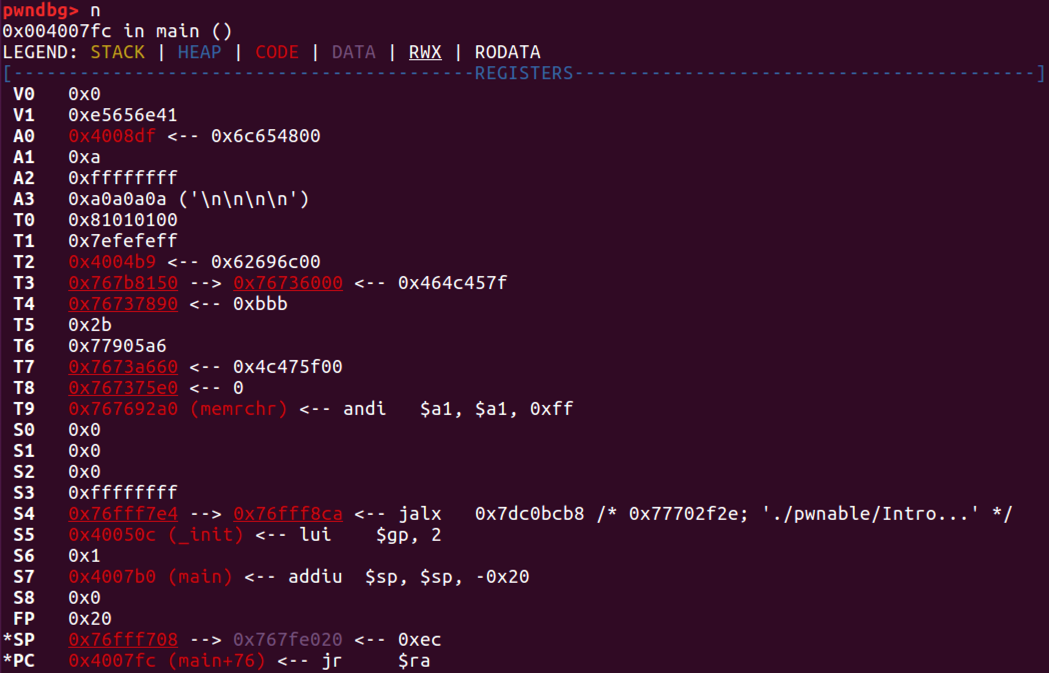
n - Some interesting things happened in that last action. Working from the bottom, we can see that we no longer have the backtrace from uClibc in the backtrace section. In the registers section, we can see the $fp register with the value of 0x20 (weird) and the $s8 register has 0.
- The next instruction will reclaim the carving of 0x20 into the stack and bring the $sp pointer back to the original memory location. The stack grows toward zero and the original 0x20 carving was a negative value to have a lower memory address. In this upcoming instruction, the program will go 0x20 positive to make the reclamation. In pwndbg, type in:
n - We can see that the $sp register is now 0x20 higher at 0x76fff708. The previous value was 0x76fff6e8.
- The next instruction will jump to the memory address in the $ra register. The $ra register was populated earlier in step 11. As MIPS accounts for a delay slot after a jump, we see the nop below the jump. The jump will take program execution to the uClibc main function epilogue where that main instance will begin its own cleanup sequence.
- In pwndbg, type in:
n - Clearly as we can see, we have entered The Matrix. Actually, no, we haven’t. But, we have continued the journey in uClibc.
- In pwndbg, type in:
c - We can see “Hello world” in the other Terminal window!
- In pwndbg, type in:
q


The next post will cover the stack overflow challenge and show how we can defeat it! Thanks for reading!
No comments:
Post a Comment