Step 3: Get the DVRF firmware onto the system
This step will focus on getting the VMware tools installed, getting the DVRF firmware onto the system, and extracting the firmware to gather information from files within the firmware. This is blog post 3 of x on learning with the DVRF project blog post series.
- There are a few ways we can get the DVRF firmware onto the virtual machine. We can either download it from the Internet from within the VM or we can download it to the host machine and use the VMWare (or the virtualization tools from the product suite being used instead) Tools to copy it over. In this case, we will need to install the VMware tools.
- In the VMware host software, within the host menu click on "Virtual Machine" and click on "Install VMware Tools". Click "Install" on the popup to begin the process to install the tools. If other virtualization software is used, follow the vendor documentation to get this installed.
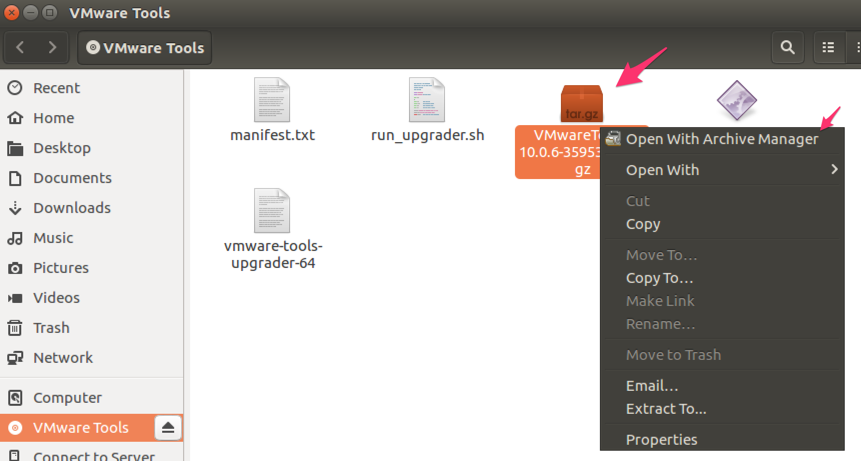
- A new folder will open with the mounted directed of the VMWare tools. Right click on VMware .tar.gz file and click on "Open with Archive Manager".
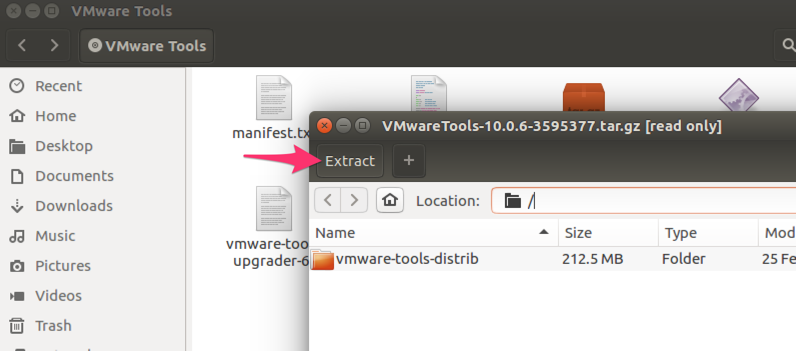
- Click on "Extract"
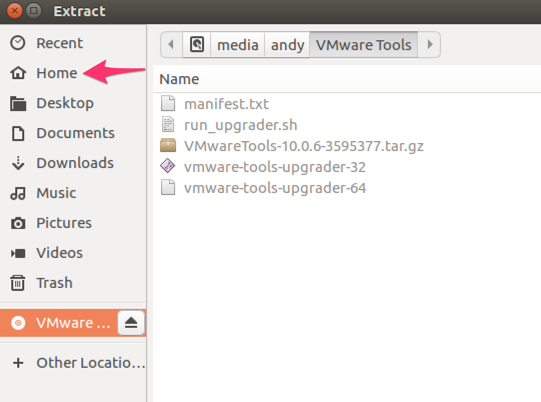
- Click on “Home”
- Click “Extract” to extract the folder contents to the home directory.
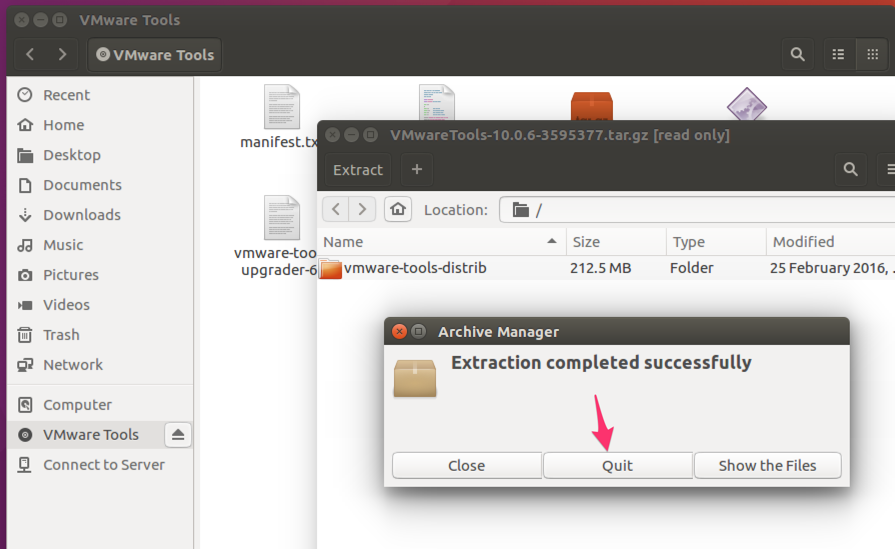
- Once this is complete, click on "Quit"
- Go to Terminal and browse to the directory with the extracted VMware tools (/home/andy/vmware-tools-distrib)
- Within the directory with the extracted VMware tools, run the script as below:
sudo ./vmware-install.pl

- A warning will appear that OS virtualization tools are available. You can use those tools instead if you'd like. You can accept the default options to proceed with the virtualization tool installation or change as needed.
- Once the installation is complete, restart the system
- In this specific case, we know the system architecture of the DVRF firmware from the original author blog posts. However, in other firmware, we may not know the endian byte order or the architecture. We can answer both of those questions by extracting the contents of the firmware and examining a file.
- Either from within the virtual machine or the host machine, download the DVRF project from GitHub: https://github.com/praetorian-inc/DVRF
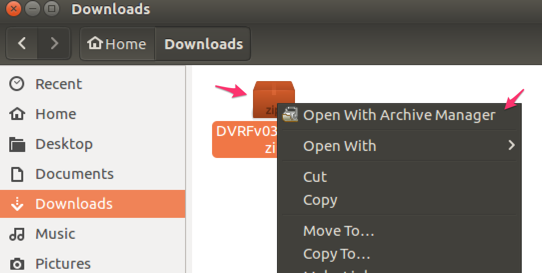
- If the DVRF project was downloaded onto the host machine, copy the archive file to the “Downloads” folder on the virtual machine
- You can use the Terminal to extract the archive file or use the GUI. This example will use the GUI. Browse to the “Downloads” folder, right click on the file and select "Open with Archive Manager".
- Click "Extract", have the files extracted to the "Downloads" folder, and quit the archive manager once that is complete
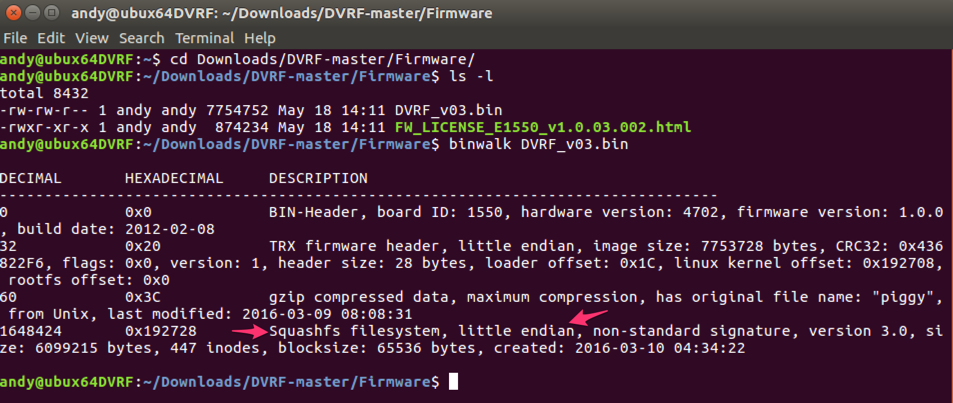
- Open up a Terminal and go to the location with the firmware bin file
- We can use binwalk to check out the firmware to get some light details of the file system contained with the .bin file. Let's start with the simple examination with the following command. In Terminal, type in:
binwalk DVRF_v03.bin - From here we can see that there is a Squash file system and that little endian is used for the byte order.
- Let's extract the firmware to further explore the data within. In Terminal, type in:
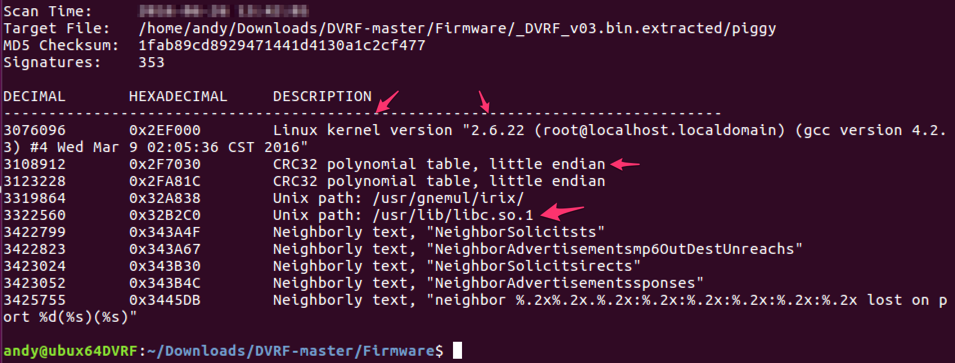
binwalk -Me DVRF_v03.bin


- When we do the extraction we can see the same first section as above showing the different parts of the firmware. The second section is new and shows information about the underlying Linux filesystem within the firmware.
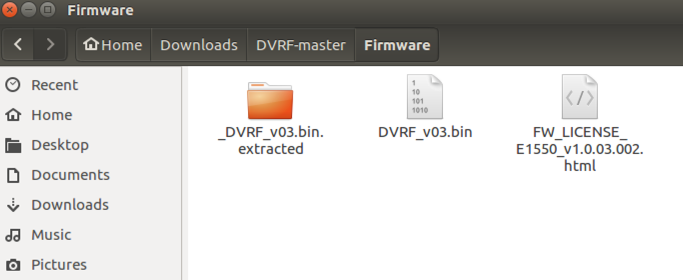
- An additional folder has been created in the same directory which contains the extracted contents
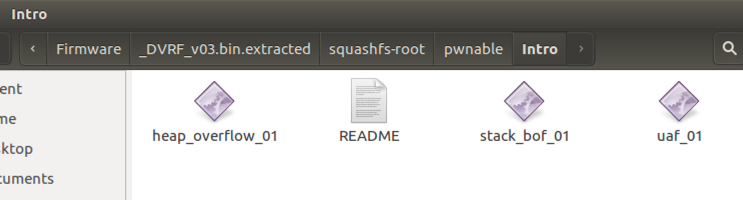
- Within this new folder, we see the “squashfs-root” folder representing the file system of the firmware. Within this folder, we can see a folder called "pwnable" which have the specific DVRF challenges that we need to solve.
- The readme file in the "Intro" directory has specific information about the various challenges that will be solved. Check this file over to see hints about each challenge.
- Now that we know for sure that the underlying byte system is "little endian" from earlier analysis with binwalk, we can check to see if the files are of a MIPS architecture. Open up Terminal and browse to the pwnable directory.
- To get the specific information about the file, we can use the "file" command. Let's try this on the stack overflow challenge file. In Terminal, type in:
file stack_bof_01 - Here we can see a few interesting pieces of information about this file system and specific architecture information. To verify little endian, we can see the "LSB executable" which stands for least significant byte indicating little endian. We can see the MIPS architecture with the 32-bit version of MIPS. We can also see that the uClibc C library is used.

- With the information above, we can go into the next step of installing buildroot with the appropriate information we gathered from specific analysis from the firmware
No comments:
Post a Comment