Instruction: Host Tap Assignment. Identify the new active communications for the Bottling facility.
Mission 6 (5 pts). Which hosts and Industrial protocol(s) are used for the process?
- Click on “Click to Launch” to go back to the file directory window
- Double click on “6. Host Tap Assignment (WIZARD)”
- A familiar informational popup box will appear indicating to the user the concerns with using a SPAN or TAP device. The wizard that was launched will configure a virtual TAP device for use in this step.
- Click “Ok” to proceed with the configuration of the virtual TAP device.
- The next popup box asks which network we should configure the virtual TAP device. The VirtuaPlant simulation is in the “Industrial” network so we will leave this at the default option and click “Ok”.
- WireShark will open and continue to become configured for this step in the background. An informational popup box will appear as well with additional information. WireShark may continue to load and begin to actively display captured traffic.
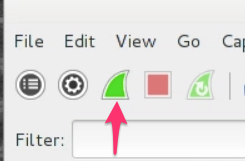
- In WireShark, click the red “Stop” looking button so we can stop the traffic and start fresh.
- At the bottom of the screen, click on the “Information” bar so we can fully read that informational popup box
- In the informational popup box we can see the message indicates what the host IP address is along with information on how to view the active connection streams
- Click “Ok” and go back into WireShark
- In WireShark, click the green “Shark” button to get a fresh capture of packets
- Click “Continue without Saving” to get a fresh start
- The middle pane in WireShark will begin to scroll with new packets. Let WireShark run for a few minutes.
- In WireShark, click the red “Stop” looking button to stop the capture of network packets.
- In Wireshark, left click on “Statistics” at the top, but hold down the left click button. You will need to hold down the button and hover over “Conversations” in the list. Once your mouse cursor is over “Conversations”, let go of the left mouse button to open up the “Conversations” window.
- Once you have the “Conversations” window open, click on “IPv4”
- Here we can see new conversations with an IP address in the 10.0.11.x range to partially answer the question for Mission 6
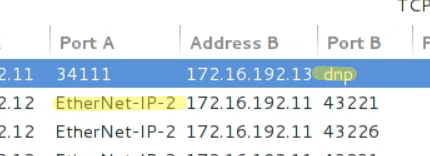
- If we click on the “TCP” tab, we can see additional information about the conversations
- Here if we look in the “Port A” and “Port B” column, we can see industrial related network protocols such as DNP3 and CIP/EtherNet-IP-2 to answer the rest of Mission 6
- Feel free to further examine the rest of the data in this window. When complete, click “Close”
- Exit WireShark and click “Quit without Saving”


No comments:
Post a Comment