Step 5: Test and verify the challenges
This step will check to see that if the challenges can be ran in the Qemu virtual environment. This is blog post 5 of x on learning with the DVRF project blog post series.
- Now let’s go back to the extracted DVRF firmware files and browse to the first stack buffer overflow pwnable challenge within Terminal.
cd (press Enter)
cd Downloads/DVRF-master/Firmware/_DVRF_v03.bin.extracted/squashfs-root/ (press Enter) - We need to copy over the appropriate version of Qemu to run the challenges. To do this, we’re going to copy Qemu to the firmware root directory. In Terminal, type in:
cp $(which qemu-mipsel-static) ./ (press Enter)
ls -l (press Enter) - Let’s verify that we can run the challenges with Qemu. We will run the challenge in a “chroot” to contain the challenge. In Terminal, type in:
sudo chroot . ./qemu-mipsel-static ./pwnable/Intro/stack_bof_01 test123 - You should see the wrong input that will show the failed message from the challenge.
- At this point, we should be able to proceed with the rest of the
- Let’s try that again but get gdb involved in the process. In Terminal, type in:
sudo chroot . ./qemu-mipsel-static -g 1122 ./pwnable/Intro/stack_bof_01 test123 - The previous step will run the challenge again, but need gdb (for instance in a second Terminal) to connect to the process on port 1122. The process won’t continue until we attach gdb and the command prompt will appear to hang. For this process, we’re going to use the GDB we configured with buildroot with version 7.10.x. Let’s open up a new Terminal, and type in:
cd (press Enter)
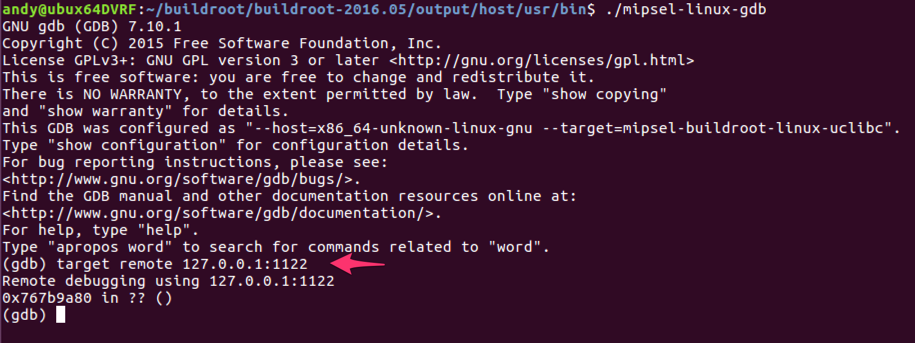
cd buildroot/buildroot-2016.05/output/host/usr/bin/ (press Enter) - Now we should run the mipsel gdb 7.10 version. In Terminal, type in:
./mipsel-linux-gdb - The step above will run GDB and now we can connect to the remote stub of GDB (even though it’s still locally available on the virtual machine). Within GDB, type in:
target remote 127.0.0.1:1122 - We are now at the entry point of the program and have control of the program. At this time, we could set up breakpoints, check out registers, or do any number of things with this specific program. However, we just want to continue making sure that basic testing works with GDB. Within GDB, type in:
c - This will let the program continue in the first Terminal window and it should fail like in the previous attempt.
- In GDB, type in: quit


No comments:
Post a Comment