Step 4: Get buildroot installed and configured on the system
This step will focus on getting buildroot installed and configured. This is blog post 4 of x on learning with the DVRF project blog post series.
- We need to add in cross-compiling support to the system so we can continue with the rest of the work. For this and as the original author stated, buildroot will be used. The original article references the “2015.11” version, but at the time of this writing “2016.05” is the latest stable copy. We will use the latest version of buildroot for this article.
- In Terminal, type in:
cd - The previous command should put us back into our home directory, let’s create a folder for buildroot. In Terminal, type in:
mkdir buildroot (press Enter)
cd buildroot (press Enter) - In Terminal, type:
tar zxf buildroot-2016.05.tar.gz - The above command will extract the files from the compressed archive. Now let’s go into the directory created from the above step. In Terminal, type in:
cd buildroot-2016.05 - We can see the contents from buildroot in this directory if we type in “ls” into the terminal
- The next step is to go through the process to get buildroot functional onto our system. To accomplish this, type in “make menuconfig” in terminal to launch the buildroot configuration utility.
make menuconfig - When I tried, I got the following error about ncurses not being available
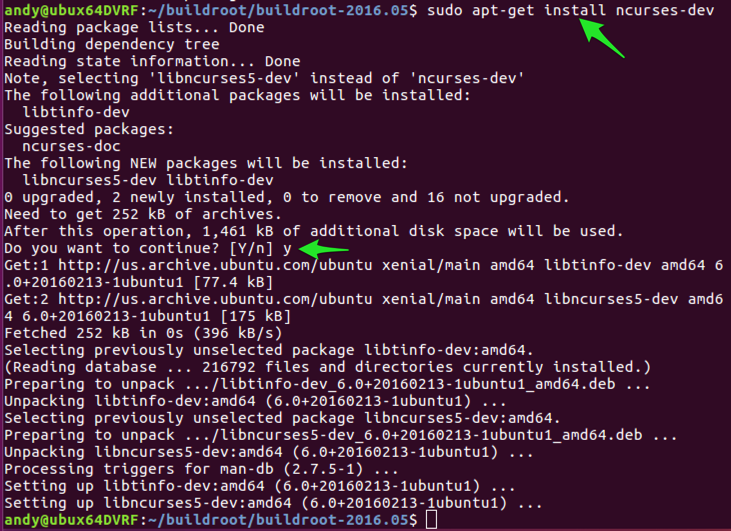
- Let’s try to install ncurses-dev and try again. In Terminal, type in:
sudo apt-get install ncurses-dev (press enter)
y (press enter) - With ncurses installed, we should be able to proceed with the make menuconfig command as we previously tried. In Terminal, type in:
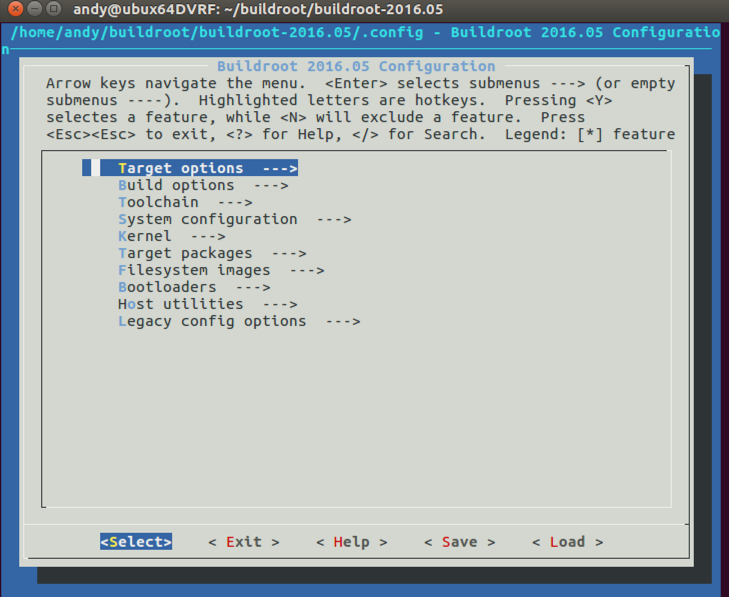
make menuconfig - Now we see a menu system for buildroot!
- In the menu prompt, press enter to select the Target
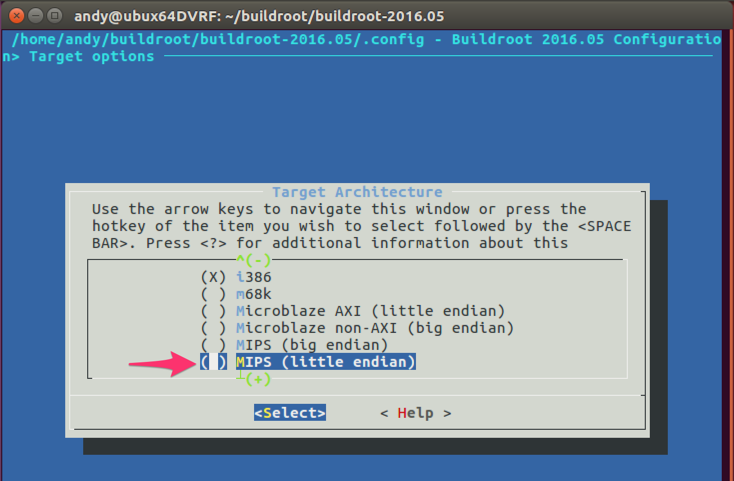
- Press the down arrow until you see MIPS (little endian)
- Press the spacebar to select the MIPS (little endian) selection
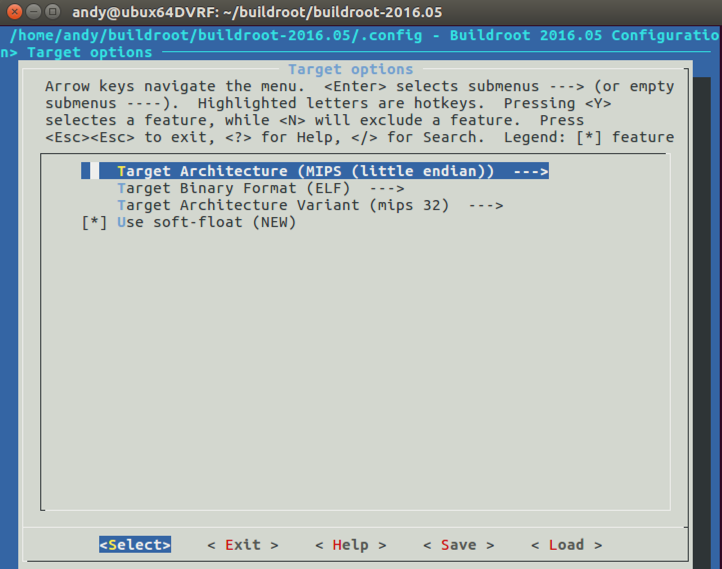
- Once this selection is made, the menu should return you to the main target selection screen and have automatically changed the binary format to ELF and the architecture variant to mips32.
- Press the escape key twice to return to the parent menu
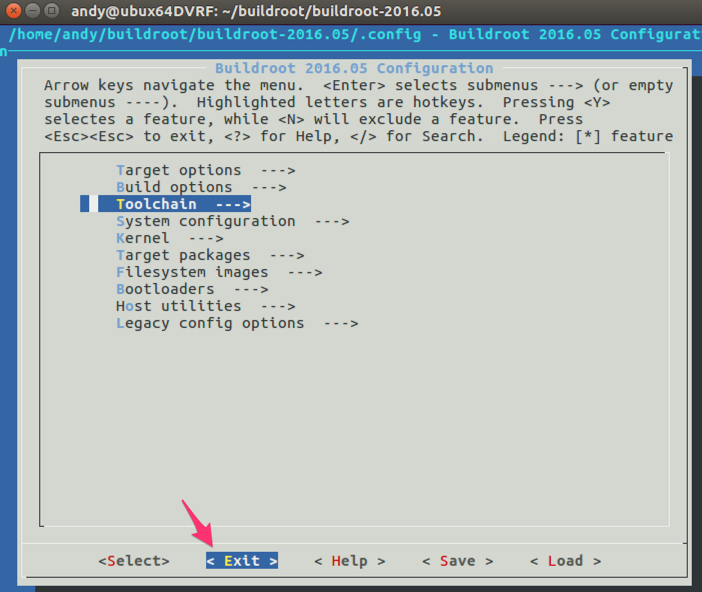
- At the parent menu, press the down arrow to go into the "Toolchain" menu and press the enter key
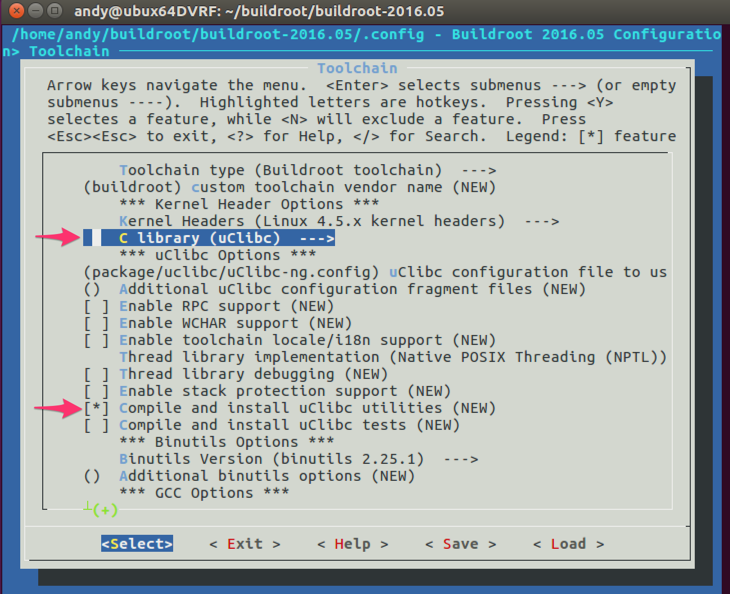
- Under Kernel Headers, you should see the "C Library" line item. Ensure the "uClibc" C library is the one selected. Make sure that "Compile and install uClibc utilities” option is also selected.
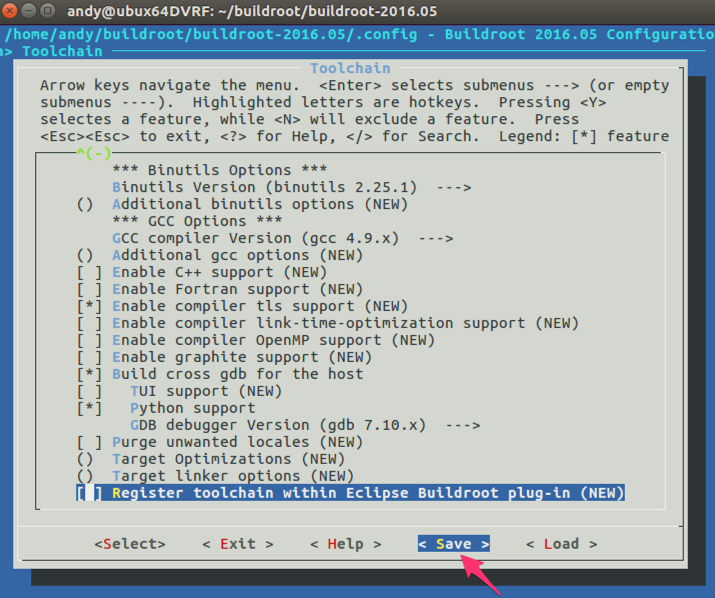
- Scroll down the list to the "GCC Options" section and press the spacebar on the "Build cross gdb for the host" line item. This will be needed to ensure that the gcc variant for mips32 will work. Once you select the cross gdb option, an additional menu will pop open. Press the spacebar on "Python support" to select that option as well.
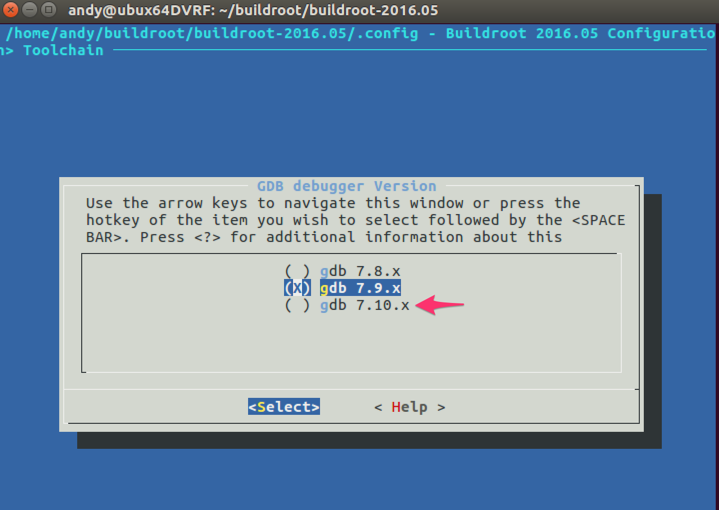
- The default gdb option is for the 7.9 version. Let's use an updated version of gdb. At the gdb line, press enter to enter the gdb menu. Here we have three options, press the down arrow to the 7.10 version and press the spacebar to select this option.
- Once the option for 7.10.x is selected, you will return to the prior menu
- Press the right arrow to change the menu at the bottom. Go to the "Save" option and press enter to save our configuration.
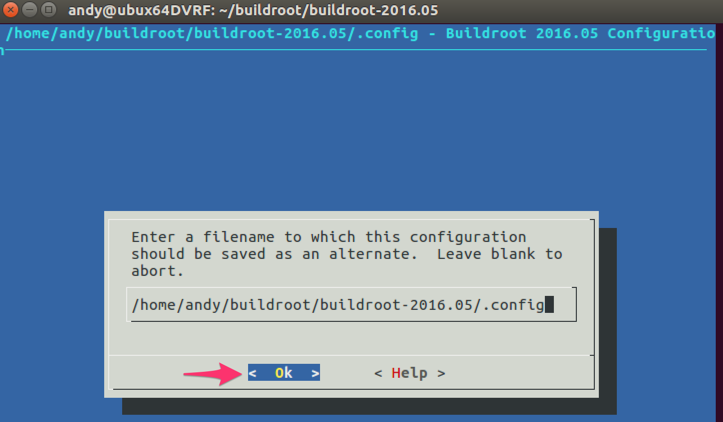
- We can leave the configuration name with the default settings or you can change it to a more appropriate filename.
- Press enter to save the configuration.
- Press the escape button twice to return to the parent menu
- At the parent menu, press the right arrow key to the “exit” option.
- Press enter to exit the application.
- Now we should have a configuration ready to use to do the actual installation of buildroot
- In Terminal, type in:
make - At this point, buildroot will be grabbing files from the Internet, configuring buildroot to our MIPS architecture configuration, and whatever else happens in the process! This will take awhile (roughly 45 minutes on my virtual machine).
- Once buildroot is done, a new directory called “output” will be created. This directory contains all of the files that buildroot created from the configuration in the prior steps.


No comments:
Post a Comment