Thursday, November 3, 2016

Fuzzy Assessment: Part 6 - Positives results from the SWAMP

In the previous post, we performed the right steps for a successful assessment of OpenSSH 4.3 in the SWAMP. As we learned, those results were hard won! Now we have a lot of results!

Let’s take a deeper look at what we have available to us:
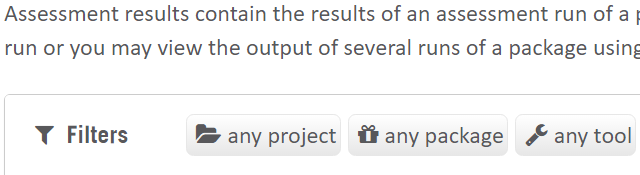
  1. Log into the SWAMP
  2. Click on “Results”
  3. Click “any package”


  4. Change the dropdown for the package to the appropriate version (in our case “OpenSSH 4.3 blog2”)
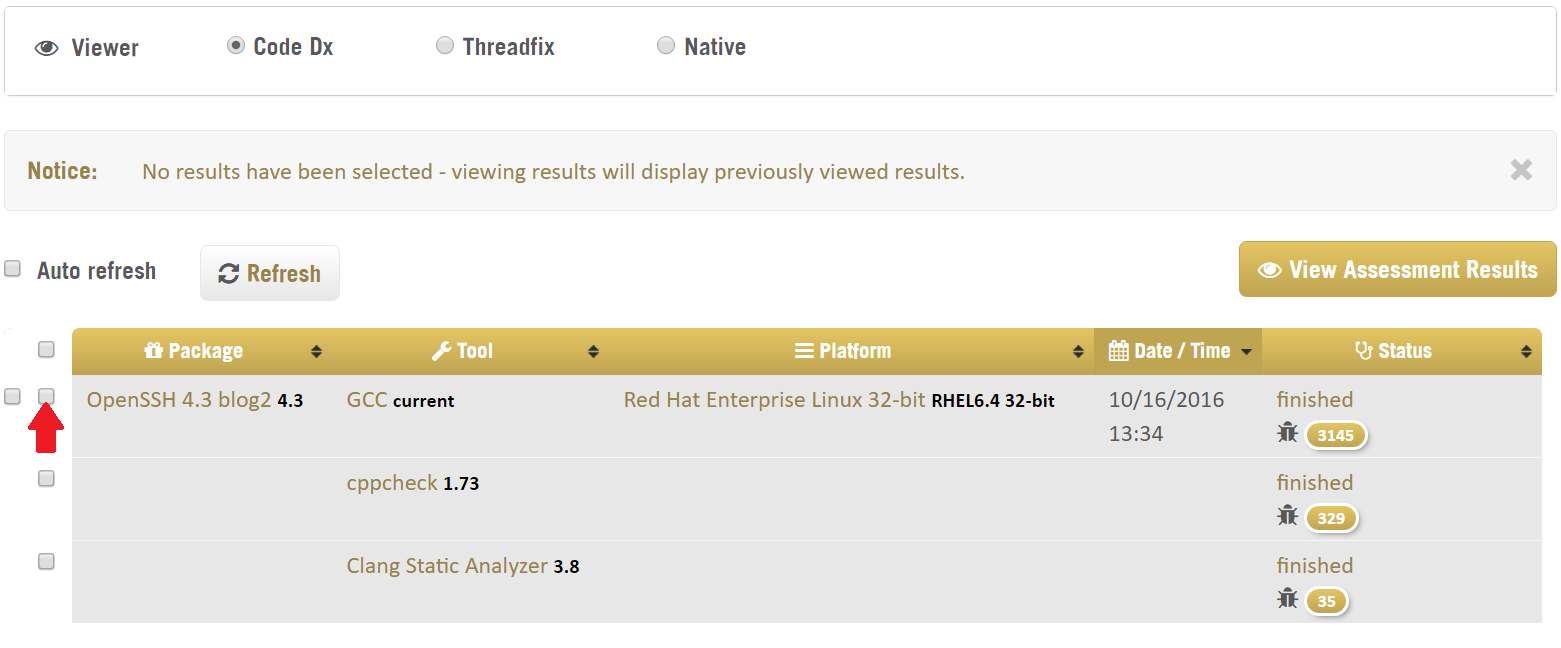
  5. Now we can see results to this specific package with our successful results!


  6. At the top, we see “Viewer” with three radio buttons of “Code Dx”, “Threadfix”, and “Native”. The default option is “Code Dx” which is one of two options to coalesce results from analysis tools into a single pane of glass. The second option is “Threadfix” which is another option to view results from multiple tools into a single pane of glass. The third option of “Native” displays the result of the tool from the standard output of the tool and may or may not be pretty.
  7. To view the results of an assessment is a little bit confusing as there are a lot of things to click on. Let’s leave the default viewer of “Code Dx” selected.
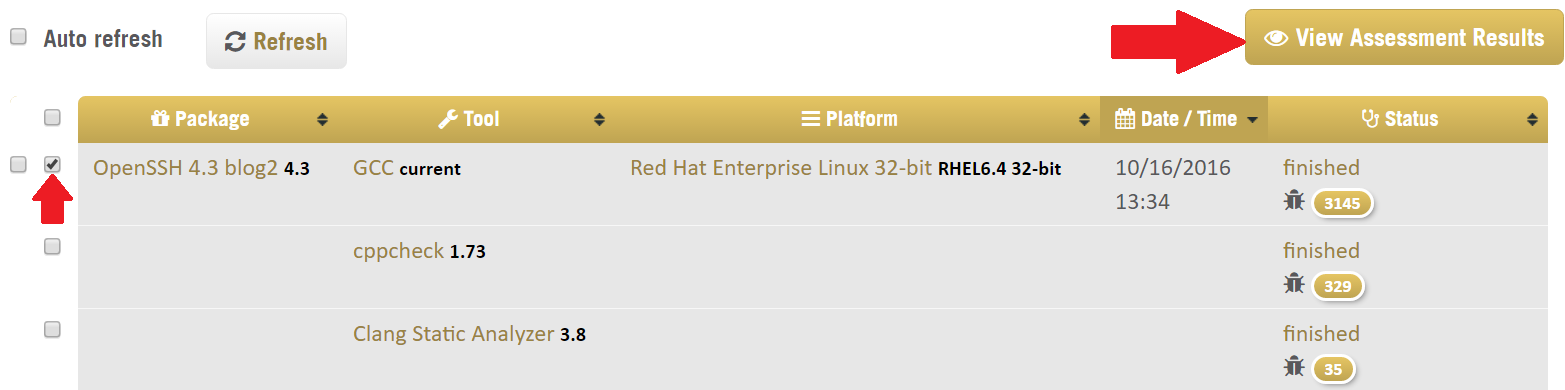
  8. Click on the checkbox for GCC (but there’s two!). Click on the right-most GCC checkbox.


  9. Navigating the checkboxes becomes easier to understand. For instance, in the screenshot above, we see 5 checkboxes. The topmost checkbox would select all results on the page to view. The leftmost checkbox would select all of the results from that particular run. The second, third, and fourth rightmost checkboxes would select the results from the individual tools.
  10. We are going to see the results from GCC from this particular assessment.


  11. You may be tempted to click on “finished” for the GCC line expecting to see the 3,145 bugs from GCC. However, these are not the droids you’re looking for. If you were to click on “finished”, you would get the details of the GCC assessment itself, not the results of the assessment. Below are the details of the GCC assessment:


  12. If you clicked on “finished” click and see these results above, click on the “Ok” button at the bottom of the screen. Back in the main results screen, click the second, rightmost checkbox for GCC results as in step 10.
  13. To see the results from the tool, we need to make sure we have the lines we wanted selected and click “View Assessment Results”


  14. A new window will pop open and a viewer for our tool will be instantiated with our data.


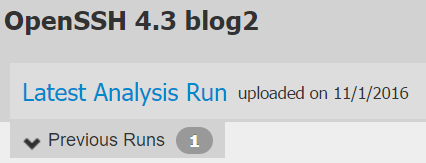
  15. Once the viewer for Code Dx is ready, you may see results from other packages or just this one depending on what you’ve done in the SWAMP. In our case, we see this:


  16. Click on “Latest Analysis Run” to see the results from this assessment
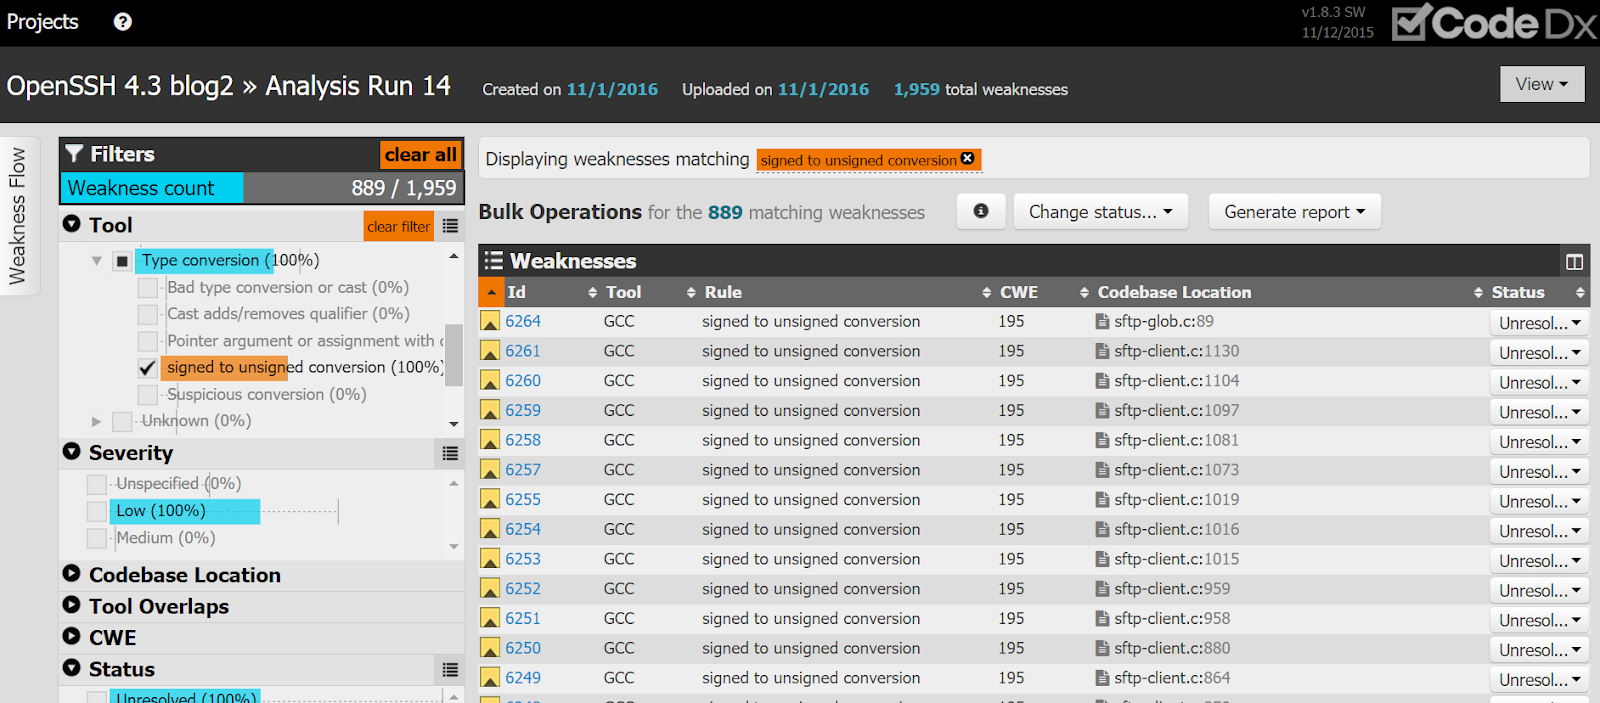
  17. Here we can see all of the data that GCC found with OpenSSH 4.3


  18. With Code Dx, we have a lot of different ways to play with this data and do so much. We can filter data on the left by severity, flaws, or any number of ways. If we filter the data by “Tool”, “Type Conversion”, and then “signed to unsigned conversion”, we can see the data filtered as below.


  19. There’s a lot of things we can do further from here. We could filter the data to even more narrow results and then assign those issues to someone to fix with exact location. Let’s take a look at what kind of details we get.
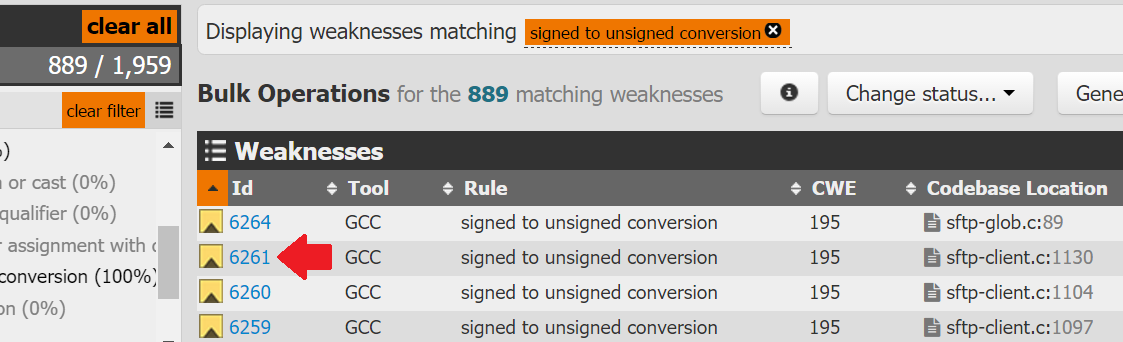
  20. Click on “6261”


  21. A new window will pop open with all of this juicy detail below:


  22. Oh no, “goto” statements are used (line 1123). At least it’s not “goto fail”. But, we see things like the type conversion issue at line 1130, links to all kinds of sources, the ability to make notes, and more!


We briefly reviewed the results from the GCC tool within Code Dx. As we can see there is a lot of capability for teams to use the SWAMP to help secure their software! In the next post, we’ll go over Threadfix and continue to examine the results.

Tuesday, November 1, 2016

Fuzzy Assessment: Part 5 - New discoveries in the SWAMP

We are getting pretty close to setting up a package that can be assessed successfully in the SWAMP! Things we may take for granted in a virtual machine are not things we can always assume will work in an automated online platform. For example, if we need additional tools in our virtual machine, we can easily download/install/compile/etc whatever we want. However, in highly controlled environments like the SWAMP, we have to play in the sandbox they provide.

Going back to the error, the error at the bottom in the previous post is pretty helpful. Let’s take a look at the error again:

make[1]: *** No rule to make target `Ssh.bin', needed by `install'.  Stop.
make: *** [scard-install] Error 2

We see the make command referencing “scard-install” which is helpful, but not obvious at this point. If we look at the start of the “Standard Error” section in the failure report, we see these lines:

FILE: build/configure_stderr.out from out/build.tar.gz
config.status: WARNING:  'Makefile.in' seems to ignore the --datarootdir setting
config.status: WARNING:  'scard/Makefile.in' seems to ignore the --datarootdir setting

If we look at the top of the failure report, we see two “build” lines and should examine both lines.


Toward the end of either build line, we see this:


With all of this information, we have better clues to help us figure out what’s going on.

Section 1: Where do we start

  1. Let’s take a look at the files we have. Browse to the directory holding the expanded contents of OpenSSH with our custom “configure.ac” from earlier.
  2. Browsing through the folder contents of our custom OpenSSH 4.3 we can see a folder named “scard”


  3. Open up the “scard” folder
  4. Interesting, there’s a “Makefile.in” file in here along with “Ssh.bin.uu”


  5. At the top of this post, the error references “Ssh.bin”. However, we can see that in this folder we see a very similar file ending in “.uu”. It was the 80s, all files ended in “.uu”. What? No.
  6. If we search on the internet to what kind of files end in “uu” you may find this Wiki article:

    https://en.wikipedia.org/wiki/Uuencoding
  7. Basically it’s a compressed file that was compressed with “uuencode”. To make the file not end in “.uu” we need to use “uudecode”. The “uuencode” and “uudecode” programs are in the RPM package “sharutils” you can read more about here.


Section 2: Make it not compressed
  1. Let’s take a look at that “Makefile.in” file. Open it up in a text editor.
  2. Thankfully this file isn’t too long and is straightforward


  3. As we can see, there are different sections. In a nutshell, we could use “make” to run different parts of this file. We saw in the “build” lines at the top of the failure report:

    “make ; make install”

    These were the “make” instructions where this process failed
  4. The process specifically failed during the “make install” part because:

    make[1]: *** No rule to make target `Ssh.bin', needed by `install'.  Stop.
  5. As we saw earlier, there is no “Ssh.bin” file unless we use uudecode. However, we see in this “makefile” that we if we do “make distprep” it will run uudecode on the “Ssh.bin.uu” file.
  6. Adding sharutils to the VM would help us out (which by default in the SWAMP, RHEL 6.4 does not have it installed). But, we can add it! Quick, back to the SWAMP!


Section 3: Is this going to work now?
  1. Log into the SWAMP
  2. Click on “Packages”
  3. Click on the modified package, in our case, it’s OpenSSH blog2
  4. Scroll to the bottom and click on the version number. In our case, it’s “4.3”.


  5. Click on “Build”


  6. Scroll to the bottom and click “Edit Build Info”
  7. Scroll to the “Build settings” section


  8. Add “make distprep; ” before “make install” as below


  9. Scroll to “Package dependencies” and click “Add New Dependency”. You may need to click this button twice to get this new window to pop up.


  10. In the window, change the platform to “Red Hat Enterprise Linux 32-bit” and enter in “sharutils” for the dependency as below


  11. This will tell the VM to add in this package so we can use uudecode in the “make distprep” part of the build process
  12. Click “OK”
  13. We can see the updated build script process as below


  14. Click “Save Build Info”. You may need to click this button twice.
  15. Click “Details”
  16. Click “Run New Assessment”
  17. Change the platform to “Red Hat Enterprise Linux 32-bit”
  18. Click “Save and Run”
  19. Check the box if you want email notifications and click “Run Now”
  20. Click “OK” in the notification window
  21. The assessment process may take a little bit more time as we’re asking the VM to do more work, but we’re getting closer to a successful build! Wait, this won’t work?
  22. Unfortunately, there’s one last error to deal with
  23. Click on the “!” for the Clang line to open up the failure report
  24. Scroll to the bottom of the failure report


  25. The error above is a permission problem. Since we’re in a VM and don’t know what kind of capabilities there are, let’s install this in /tmp instead to see if that alleviates permission problems.
  26. If we look at the “INSTALL” file from the OpenSSH directory, we see the following information


  27. If we want to install OpenSSH into an alternate directory, we need to specify configure with the “prefix” argument and a path such as “/tmp”. Let’s do that!


Section 4: One last thing to change
  1. Go back to the packages screen in the SWAMP
  2. Click on our modified package, in this case is “OpenSSH 4.3 blog2”
  3. Click on the version, in this case is “4.3”
  4. Click on “Build”
  5. Scroll to the bottom and click on “Edit Build Info”
  6. Go to the “Configure settings” section


  7. Add in “ --prefix=/tmp” after “./configure” as below


  8. Our new build process should look like this


  9. Click “Save Build Info”. You may need to click this button twice.
  10. Click on “Details”
  11. Scroll to the bottom and click “Run New Assessment”
  12. Change the platform to “Red Hat Enterprise Linux 32-bit”
  13. Click “Save and Run”
  14. Check the box if you want email notifications and click “Run Now”
  15. Click “OK” in the notification window
  16. Let’s wait for our SUCCESSFUL assessment to complete!


  17. You can click on the “finished” links to see the results of each tool. We will cover the data from this assessment in another post and go over the findings from each tool and bug viewer.